 |
| Choosing our pumpkin at a local roadside stand - 2009 |
Ok, so enough blathering on about pumpkins... let's get to the real deal. By now, you should have decreased your pumpkin until all that remains at the top is a small hole, 6 single-crochet stitches around. You'll need to pull a bit more than a yard (1 meter) of extra yarn off the ball and set it to the side. Then, finish off.
If the hole seems a little too large to you, now is a great time to use your trusty yarn needle to gather the stitches and pull them a little tighter. You can also do this after you make the lobes or sections of the pumpkin -- it depends on what you prefer.
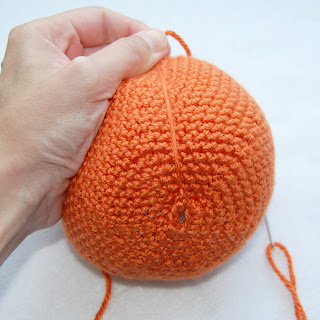
Take your slack yarn and pull it downward, across the side of your pumpkin, toward the bottom. To get really defined sections, you'll want to keep the yarn very tight as you do this.
When you get to the bottom, sew through one of the stitches in the foundation chain and pull your slack up tight. Then, turn the pumpkin and pull the slack yarn back up to the top where you started, keeping the yarn tight.
Repeat this 4-5 more times, and finish off when you get back to the top after your last section.
And, if you feel like the hole at the top has gotten to big with all the tugging and stretching, you can still gather the stitches with a little extra yarn. Remember though that we'll be putting the stem over the hole, so it doesn't have to be perfect.
As for the bottom, if you don't like the hole there, check out this brilliant idea by Lstein0:
That's right! She added a button to the bottom of her pumpkin! Thanks for the great idea!
Ok... next up, the stem. So get out your green yarn and keep your eyes out for the next lesson!


No comments:
Post a Comment